Text formatting is a first basic skill you should learn and master before moving to more complex topics. It involves 2 distinct steps:
– Marking up relevant portions of text with HTML (HTML markup)
– Defining CSS styles for the HTML elements used in the page. This second step is optional, as the various elements already have a default style defined in browsers (for example links will render by default in blue and underlined, h1 will be bigger than h2, etc…). However using CSS allows a tight control on the aspect of HTML elements and pages and also allows the creation of complex page layouts that would be otherwise impossible to achieve.
In this chapter section we will focus on the first step, the HTML markup. Consider, while looking at how the various code examples render in a browser, that the actual aspect and graphical rendering of each single HTML tag can be changed deeply by applying a particular style to them. So you should not focus on the default graphical aspect of the elements, but rather on their semantics. Each tag adds “meaning” to the tagged text or page contents part, this is what you should focus on. Appearance will be addressed in the CSS section of this chapter.
Paragraphs – The p tag
A basic unit of a text are the paragraphs. A paragraph can be delimited with the <p> tag. In the following examples we will use the “Lorem Ipsum” text, traditionally used as “dummy” filler text for web pages waiting for their actual contents. You can generate your own custom Lorem Ipsum here.
|
1 2 3 4 5 6 7 8 9 10 11 |
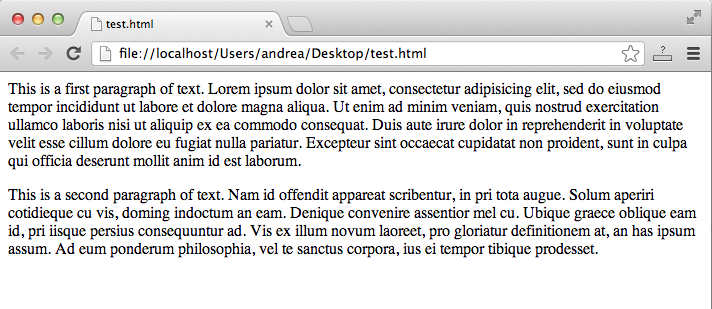
<p> This is a first paragraph of text. Lorem ipsum dolor sit amet, consectetur adipisicing elit, sed do eiusmod tempor incididunt ut labore et dolore magna aliqua. Ut enim ad minim veniam, quis nostrud exercitation ullamco laboris nisi ut aliquip ex ea commodo consequat. Duis aute irure dolor in reprehenderit in voluptate velit esse cillum dolore eu fugiat nulla pariatur. Excepteur sint occaecat cupidatat non proident, sunt in culpa qui officia deserunt mollit anim id est laborum. </p> <p> This is a second paragraph of text. Nam id offendit appareat scribentur, in pri tota augue. Solum aperiri cotidieque cu vis, doming indoctum an eam. Denique convenire assentior mel cu. Ubique graece oblique eam id, pri iisque persius consequuntur ad. Vis ex illum novum laoreet, pro gloriatur definitionem at, an has ipsum assum. Ad eum ponderum philosophia, vel te sanctus corpora, ius ei tempor tibique prodesset. </p> |
Here’s how this code will display in a browser:
Line Breaks – The br tag
See how the newlines after the text in english, the first sentence in each paragraph, are ignored. Let’s fix it with Break tags:
|
1 2 3 4 5 6 7 8 9 10 11 |
<p> This is a first paragraph of text.<br> Lorem ipsum dolor sit amet, consectetur adipisicing elit, sed do eiusmod tempor incididunt ut labore et dolore magna aliqua. Ut enim ad minim veniam, quis nostrud exercitation ullamco laboris nisi ut aliquip ex ea commodo consequat. Duis aute irure dolor in reprehenderit in voluptate velit esse cillum dolore eu fugiat nulla pariatur. Excepteur sint occaecat cupidatat non proident, sunt in culpa qui officia deserunt mollit anim id est laborum. </p> <p> This is a second paragraph of text.<br> Nam id offendit appareat scribentur, in pri tota augue. Solum aperiri cotidieque cu vis, doming indoctum an eam. Denique convenire assentior mel cu. Ubique graece oblique eam id, pri iisque persius consequuntur ad. Vis ex illum novum laoreet, pro gloriatur definitionem at, an has ipsum assum. Ad eum ponderum philosophia, vel te sanctus corpora, ius ei tempor tibique prodesset. </p> |
This gives:
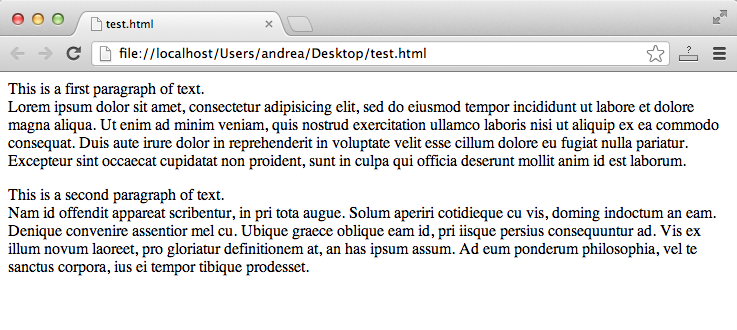
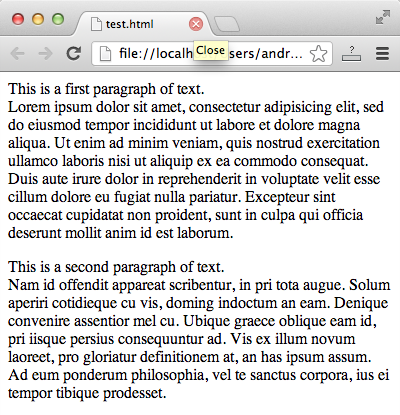
You can now see the line break after the first sentence of each paragraph in the browser output. You may argue though, that there are other line breaks present in the text, as shown in the last figure. This is just because the text that would normally be on one single line, will adapt to the browser window width by creating “fake” newlines as required to fit in the window rather than generating an horizontal scrolling bar at the bottom of the window. Check this by stretching the browser window on a page with the code above.
Titles and Subtitles – The h tags
There are several reasons for including at least titles, and possibly subtitles, in your text:
- The titles hierarchy is used to build the Document Outline. You can check the outline of your HTML5 document by using the outliner and learn more about the document outline in this article
- Titles tell search engines what your text is about
- Titles and subtitles bring order to your text and make it more readable
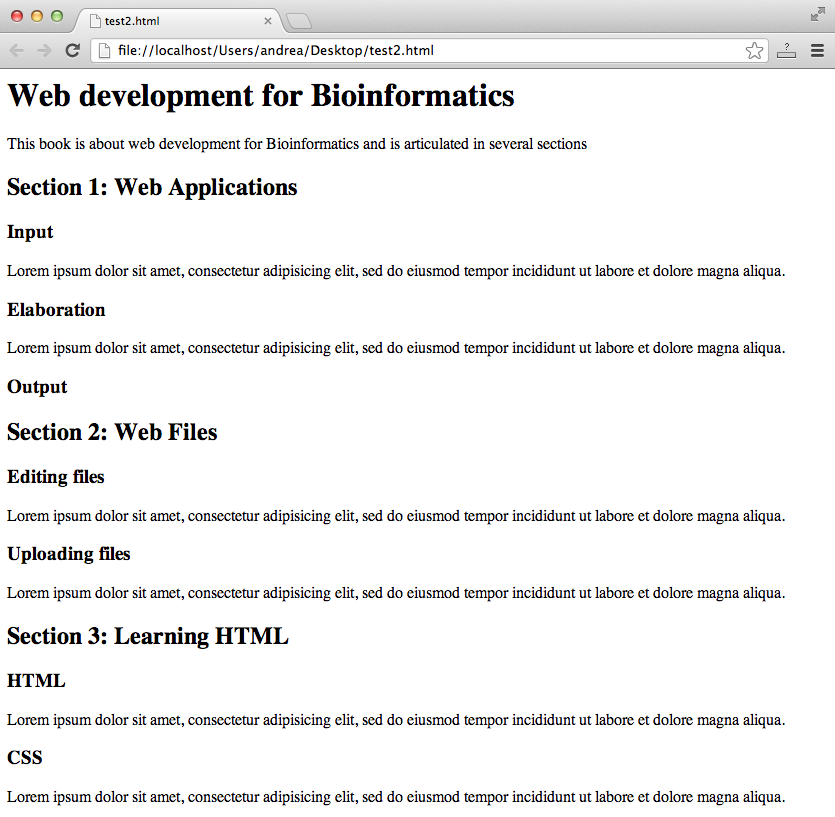
There are 6 h tags available to create a hierarchy of titles and subtitles in a document, from h1, the main title, to h6, the last subtitle.
What follows is a simple example of how we could use the h tag to present an hypothetical summary of this book in a page.
|
1 2 3 4 5 6 7 8 9 10 11 12 13 14 15 16 17 18 19 20 21 22 23 24 |
<h1>Web development for Bioinformatics</h1> <p>This book is about web development for Bioinformatics and is articulated in several sections</p> <h2>Section 1: Web Applications</h2> <h3>Input</h3> <p>Lorem ipsum dolor sit amet, consectetur adipisicing elit, sed do eiusmod tempor incididunt ut labore et dolore magna aliqua.</p> <h3>Elaboration</h3> <p>Lorem ipsum dolor sit amet, consectetur adipisicing elit, sed do eiusmod tempor incididunt ut labore et dolore magna aliqua.</p> <h3>Output</h3> <h2>Section 2: Web Files</h2> <h3>Editing files</h3> <p>Lorem ipsum dolor sit amet, consectetur adipisicing elit, sed do eiusmod tempor incididunt ut labore et dolore magna aliqua.</p> <h3>Uploading files</h3> <p>Lorem ipsum dolor sit amet, consectetur adipisicing elit, sed do eiusmod tempor incididunt ut labore et dolore magna aliqua.</p> <h2>Section 3: Learning HTML</h2> <h3>HTML</h3> <p>Lorem ipsum dolor sit amet, consectetur adipisicing elit, sed do eiusmod tempor incididunt ut labore et dolore magna aliqua.</p> <h3>CSS</h3> <p>Lorem ipsum dolor sit amet, consectetur adipisicing elit, sed do eiusmod tempor incididunt ut labore et dolore magna aliqua.</p> |
Here’s the how the browser renders the code above:
The document outline of the page, as assessed by using the HTML5 outliner, is shown below.
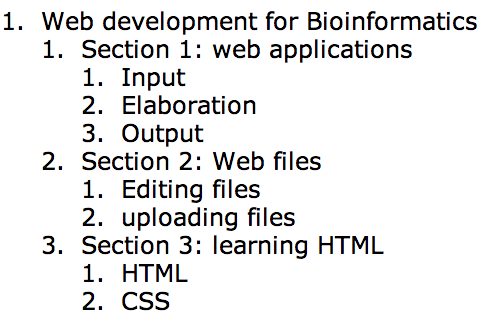
The more you structure your text with a correct titles hierarchy, the more your page will be understandable and accessible to humans and to automated browsing/parsing systems such as those used by search engines (never forget that it’s not only humans that may be interested in reading or understanding your page contents!).
Block and Inline Elements
See how, when text is wrapped in an h tag, it will stay on a line of it’s own. The h tag is indeed a block element, as opposed to other elements, such as for example the Strong and Em tags we have shown in the introduction of this chapter, that are inline or phrasing elements. When a chunk of text is tagged with an em tag or a strong, no line breaks will be generated.
|
1 2 3 |
My <strong>BEAUTIFUL</strong> cat |
will render as:
My BEAUTIFUL cat
rather than
My
BEAUTIFUL
cat
as would happen if strong was a block element.
i, b, em and strong elements
Traditionally, before the birth of semantic HTML, italicized text was rendered with an i (for italic) tag
|
1 2 3 |
It was an <i>intense</i> moment |
will render as
It was an intense moment
Bold text was rendered with a b (bold) tag
|
1 2 3 |
It was an <b>intense</b> moment |
will render as
It was an intense moment
Both i and b are focused directly on how the text should be rendered graphically, rather than on the meaning (semantics) of the text.
As already discussed in the introduction of this chapter, with the introduction of semantic HTML there was a shift toward a different usage of markup, that is now focused on defining the meaning/nature/semantics of a tagged portion of a page, rather than it’s appearance. The appearance part is instead defined in the CSS declarations associated with a page.
As a consequence of this semantic drift, i and b are increasingly replaced by em and strong, which are tags born with a semantic syntax in mind. By default, em will render as italic and strong will render as bold.
For an in-depth discussion on this matter, and for learning about the re-definition of the i and b tags in HTML5, we suggest you read this article.
Lists – The ul, ol and li tags
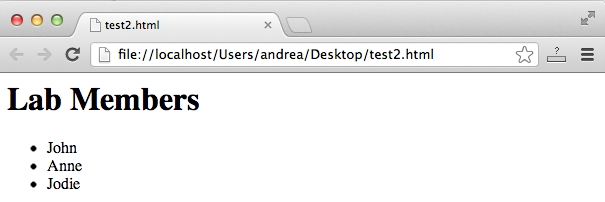
It is often useful to create lists, either unordered (bullet lists), or ordered (numbered list). This is done with the ul (Unordered List) and the ol (Ordered List) tags. ul and ol tags are opened to mark the beginning of a list and closed at the end of the list. Within a list, each list item is identified with a li tag.
Unordered Lists
|
1 2 3 4 5 6 7 8 9 |
<h1>Lab Members</h1> <ul> <li>John</li> <li>Anne</li> <li>Jodie</li> </ul> |
Ordered Lists
|
1 2 3 4 5 6 7 8 |
<h1>Lab Members</h1> <ol> <li>John</li> <li>Anne</li> <li>Jodie</li> </ol> |

Note how the code indenting, in this case the indenting of the li elements with respect to the ul or ol elements, makes the code more readable and how it’s easier to spot out where the lists begin and end. We will come back to code indenting and good programming practices (GPP) later in this chapter.
The default aspect of lists can be manipulated extensively with CSS. For instance, it is common to use unordered lists in navigation menus, both vertical menus and, less intuitively, horizontal menus. Indeed the relative position of the li elements, that behave by default as block elements, can be changed to inline by a simple CSS declaration:
|
1 2 3 |
li {display : inline;} |
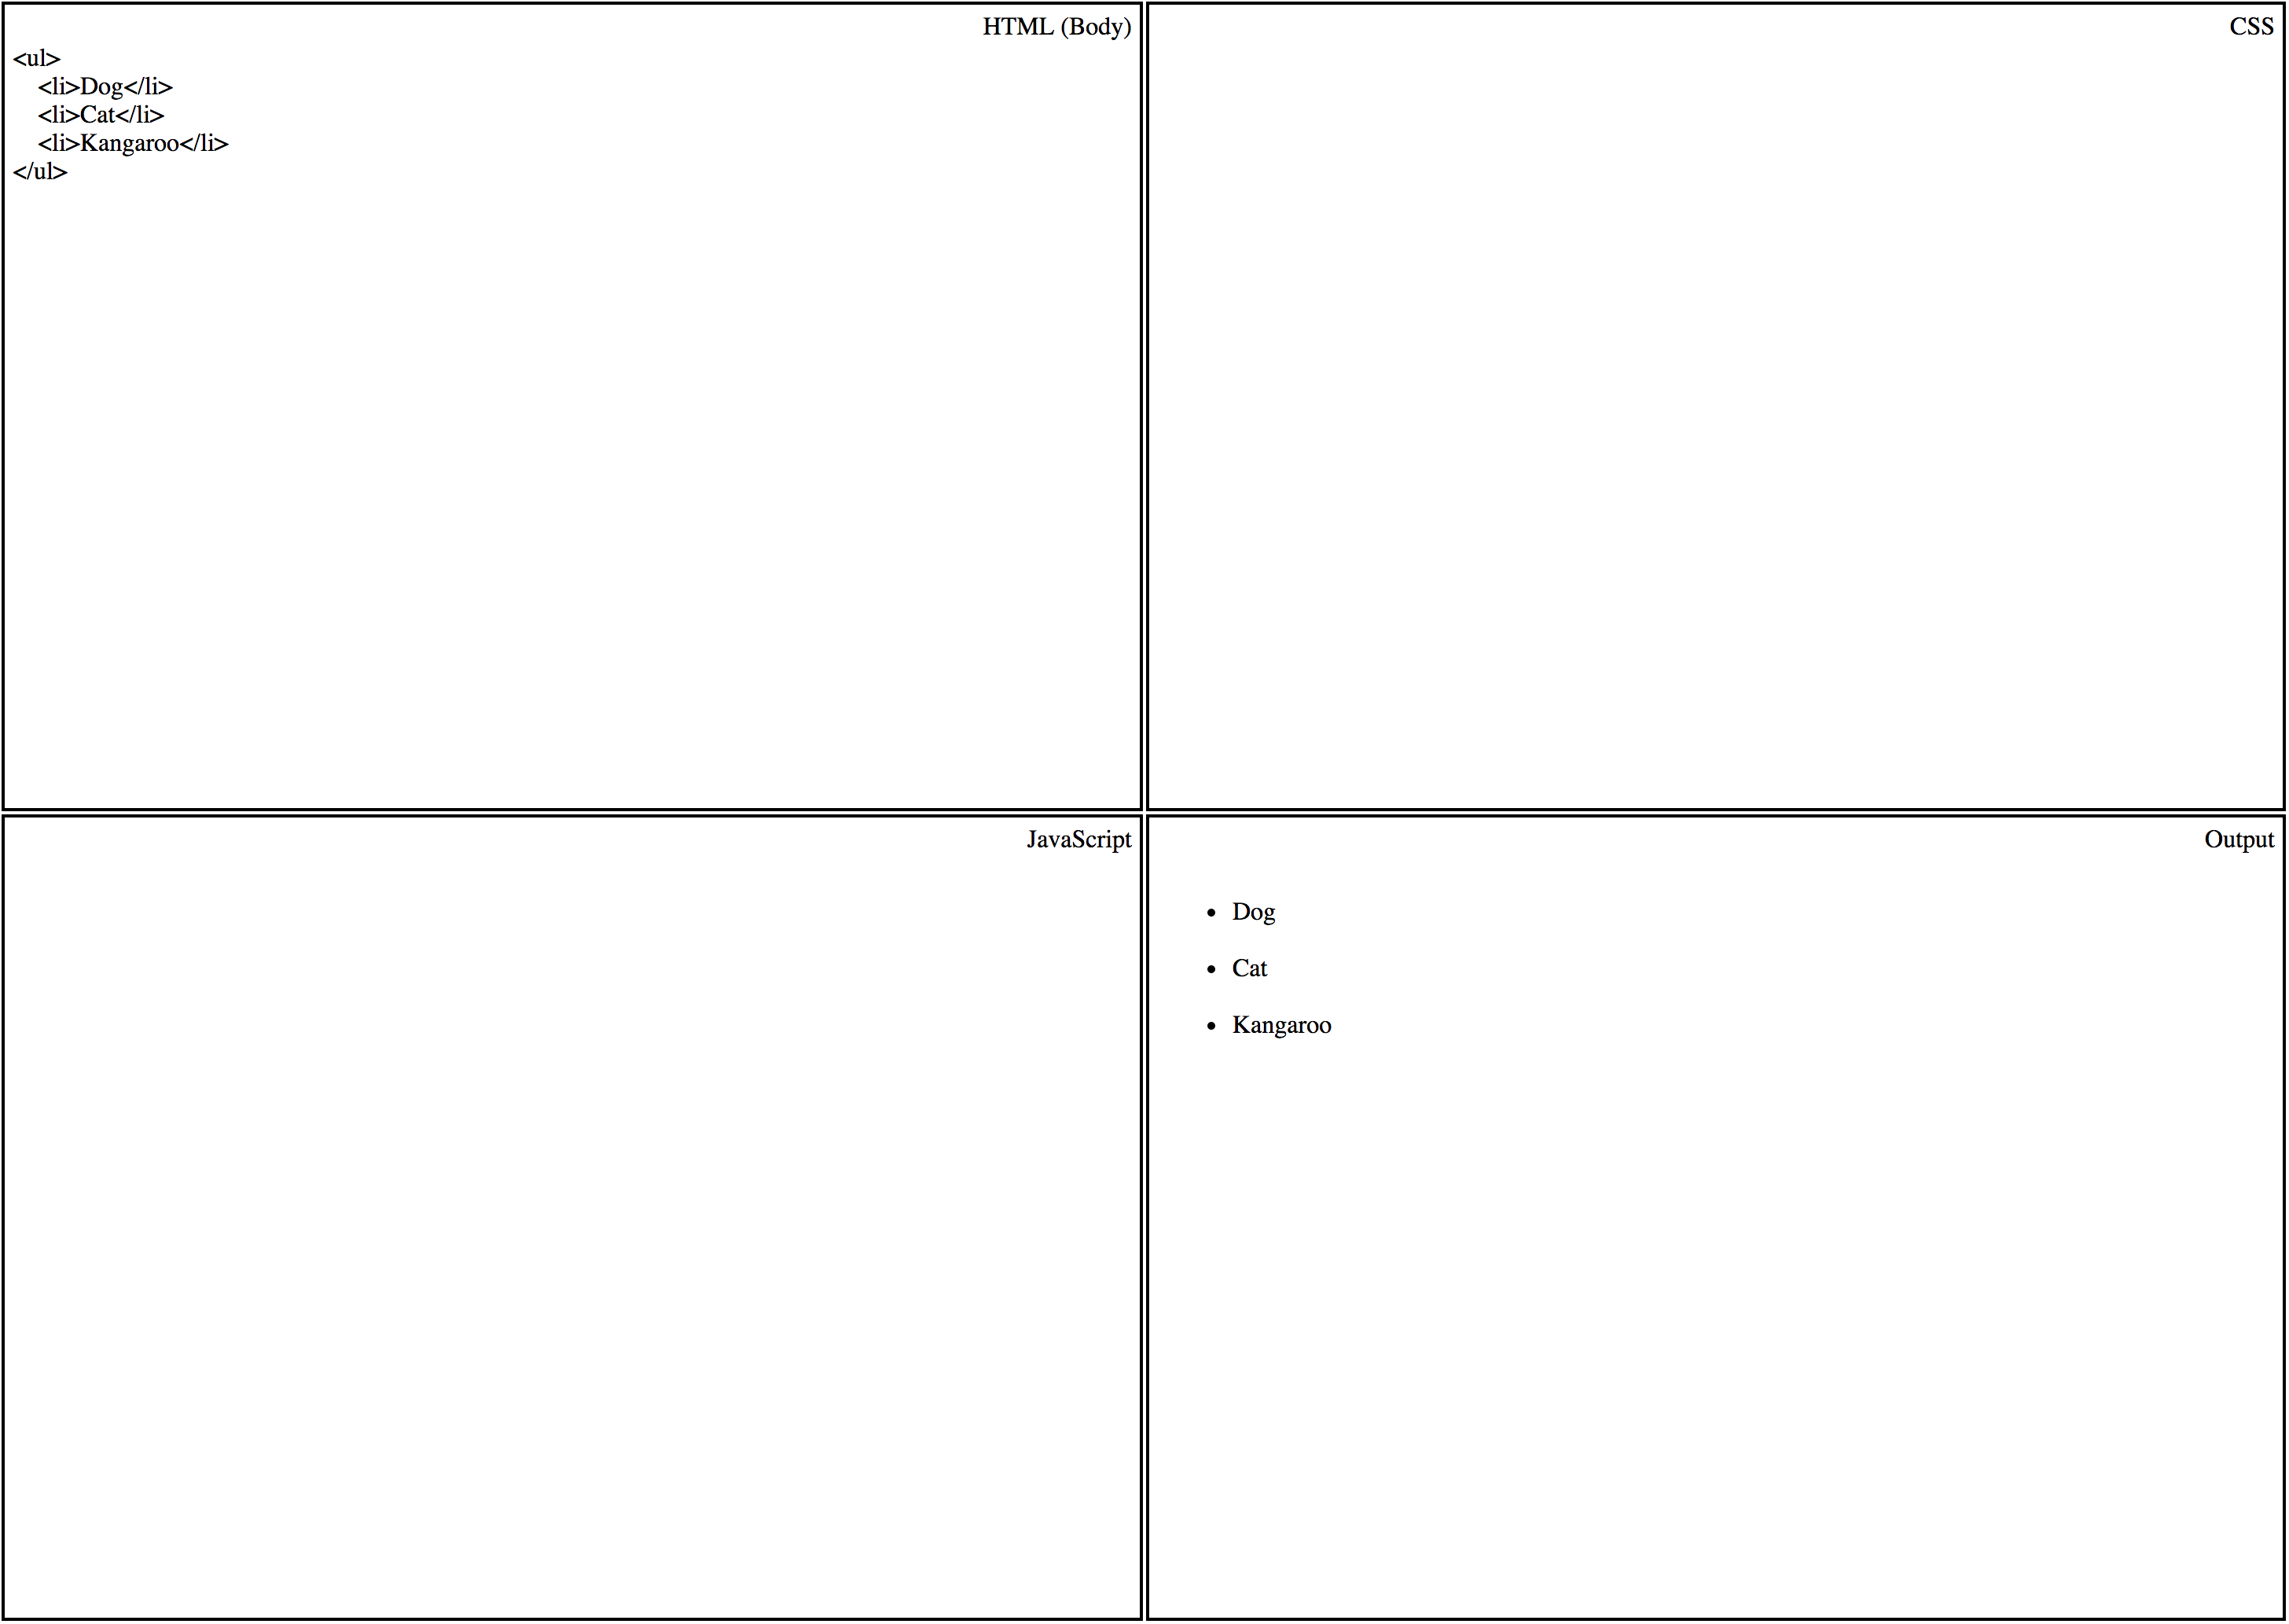
Try the following: in the cellbiol.com web editor copy-paste the following code for a list:
|
1 2 3 4 5 6 7 |
<ul> <li>Dog</li> <li>Cat</li> <li>Kangaroo</li> </ul> |
in the upper-left HTML pane and check out the rendering in the lower-right output pane:
Then add the following CSS declaration in the upper-right CSS pane and check the rendering in the output pane again:
|
1 2 3 |
li {display : inline;} |
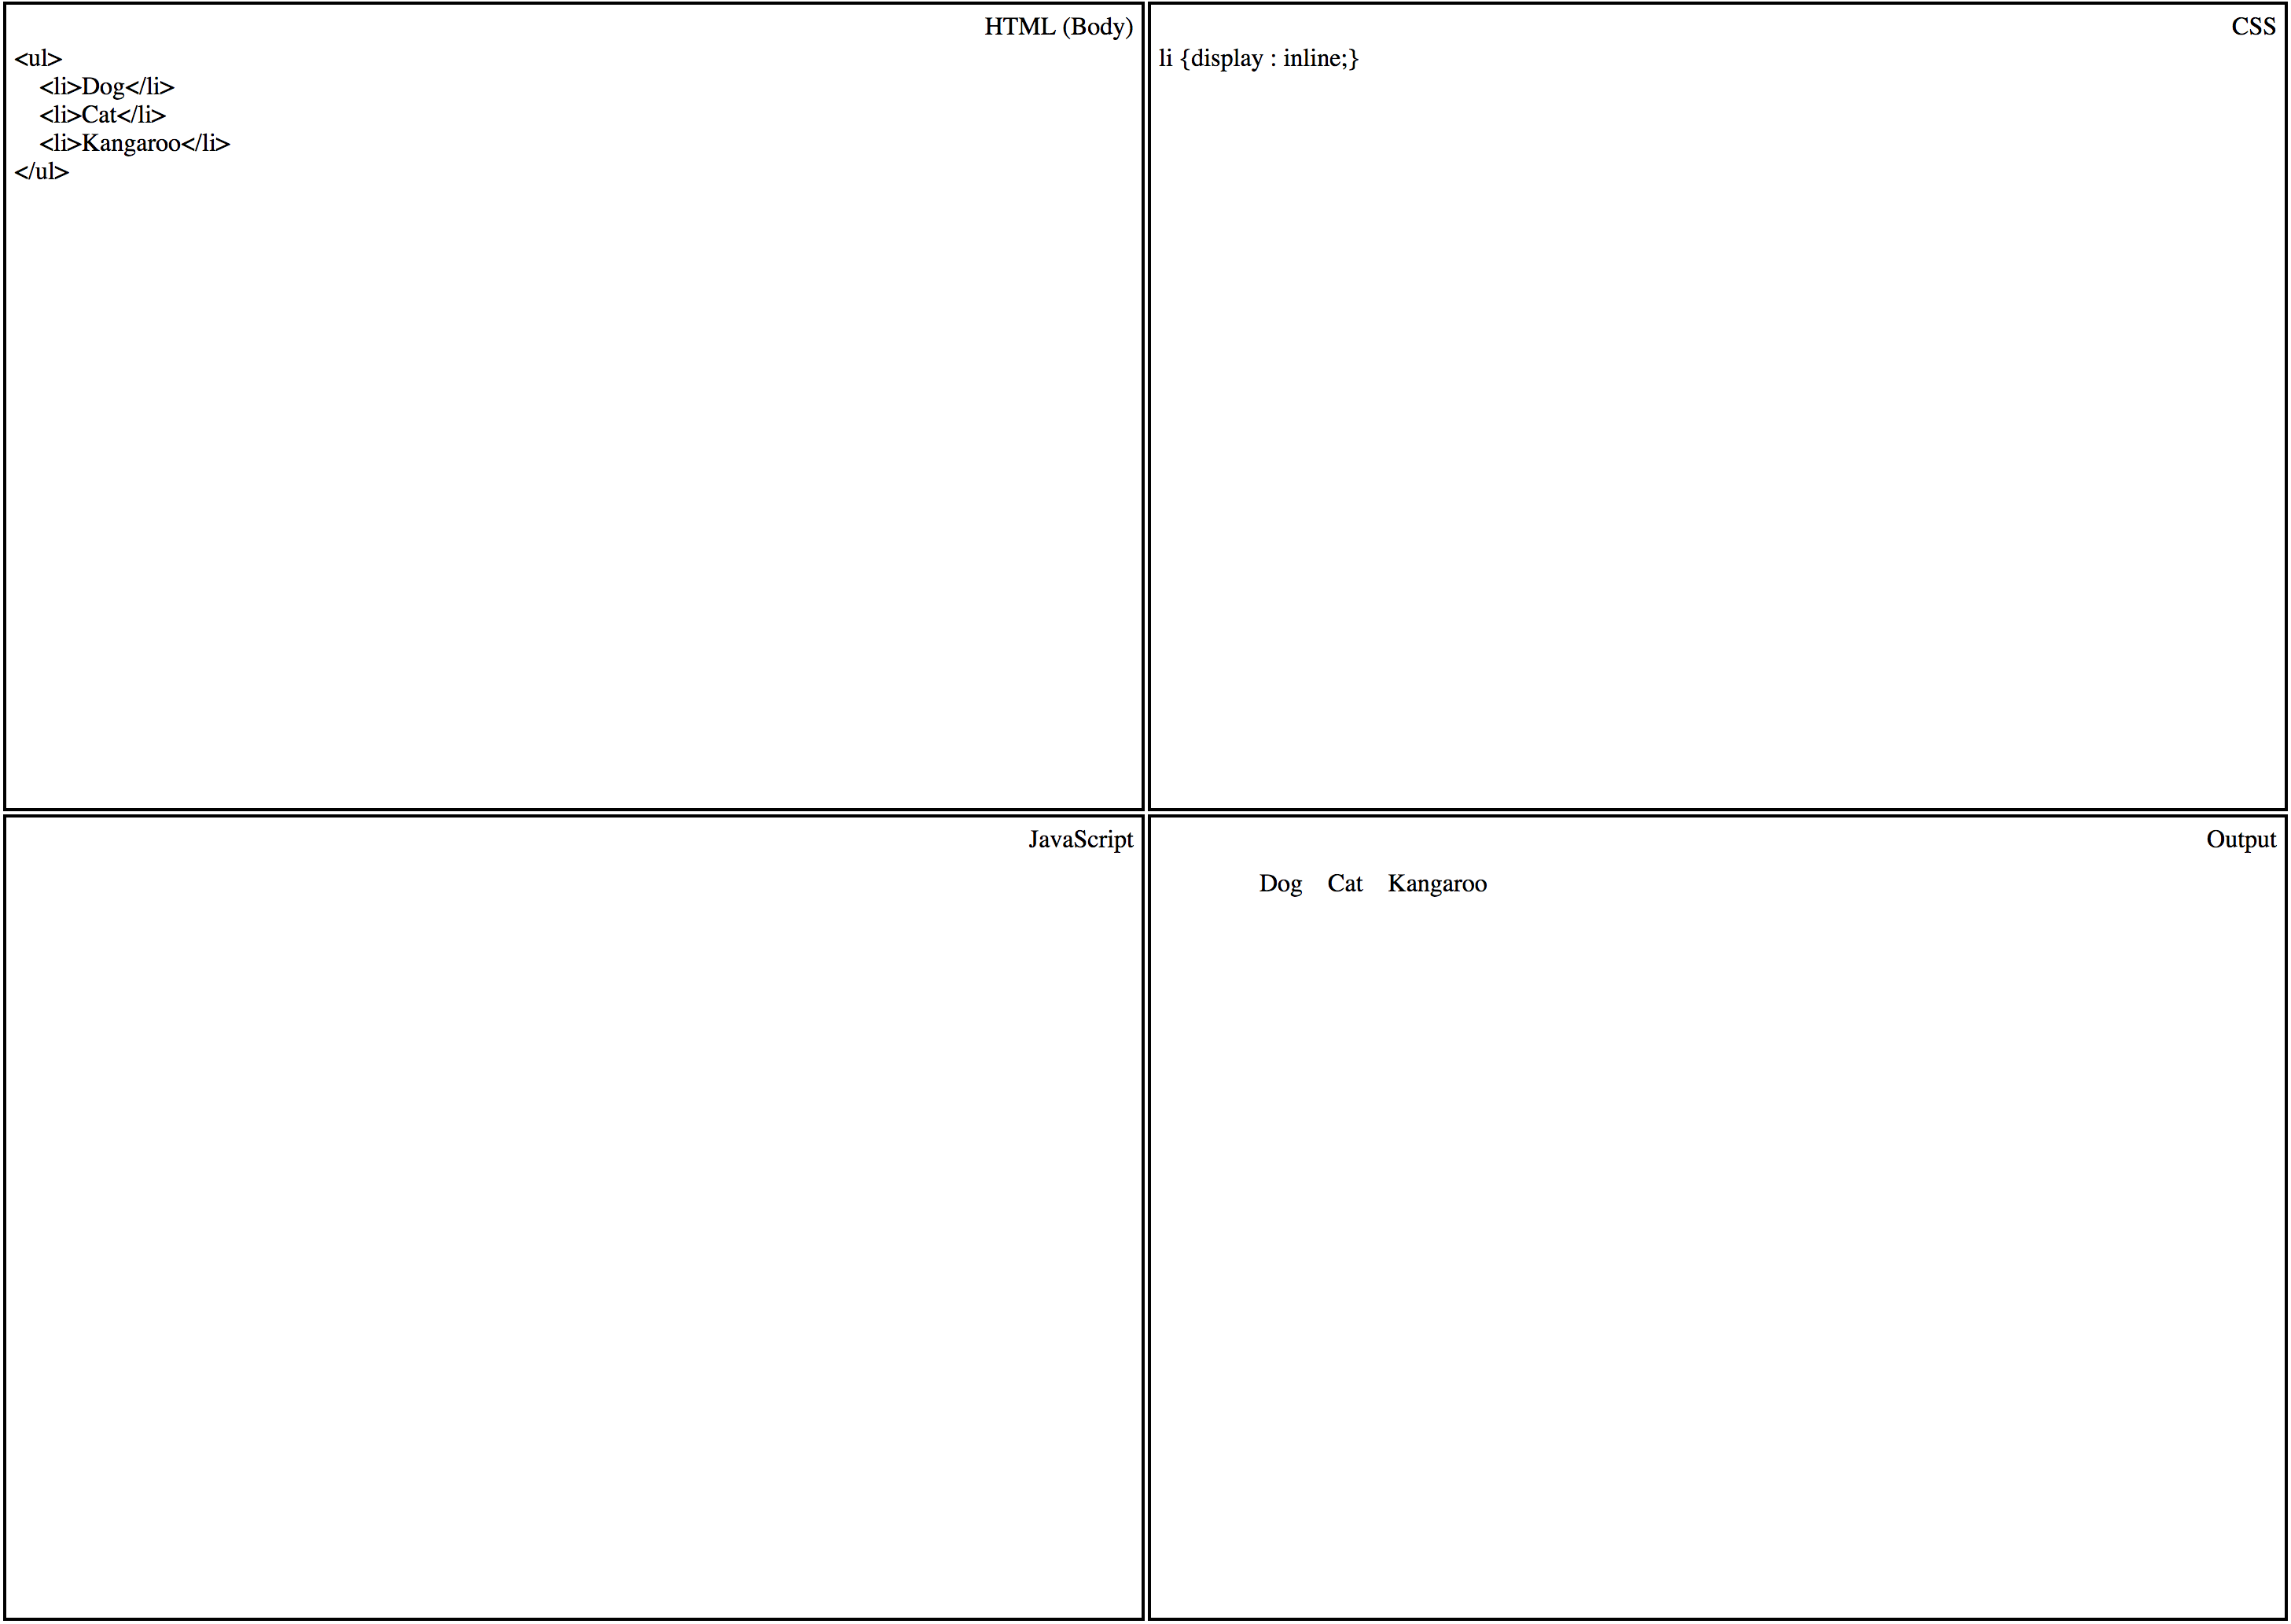
Please note that this CSS declaration will turn all the li elements in the page to inline, probably not what we really want. We will need to be able to apply the declaration to a particular list or a particular subset of lists. More on this later.
Links and the a tag
Links are the basis of the “Web” part of the World Wide Web which is indeed a network of interlinked web pages.
Links Anatomy
Links, typical phrasing/inline elements, are composed of two main parts: the text to be linked, wrapped in the a tag and the destination URL, included as value of the href attribute of the a tag.
In the example below (what follows is an enumeration, let’s use a bullet list!):
- The link text is “the NCBI web site”
- The URL is http://www.ncbi.nlm.nih.gov/
|
1 2 3 |
It's now time to visit <a href="http://www.ncbi.nlm.nih.gov/">the NCBI web site</a> to learn about biological databases |

If you want the linked website to be opened in a new window or tab when the visitor clicks on it, you can use the target attribute and assign it a _blank value:
|
1 2 3 |
It's now time to visit <a href="http://www.ncbi.nlm.nih.gov/" target="_blank">the NCBI web site</a> to learn about biological databases |

Which Values for the href Attribute?
The href attribute accepts as values both URLs (starting with “http”) and, for linking to local files hosted in the same filesystem as the page with the link, the relative path of the file to be linked with respect to the location of the page where the link is located or the absolute path of the file with respect to the Document Root (indicated with a /, more on this below). Mind that the Document Root folder referred by the slash in this context is the one defined in the Apache configuration file, typically /var/www/html, rather than the linux filesystem root, don’t let this confuse you!
Links to local files are known as internal links, while links to pages on other web sites are known as external links. In general, paths are used for internal links while URLs are used for external links. While you could in principle use an URL for an internal link, there is no way you can use a path for an external link, as paths point to elements in the same filesystem of the page that contains the link.
Let’s imagine that our web root is a public_html directory in a user home directory. We have two files inside public_html, index.html and index2.html. We want to create a link in the index.html page that points to the index2.html page.
|
1 2 3 |
<a href="index2.html">Go to page 2</a> |
Indeed the relative path of index2.html with respect to index.html is as simple as:
index2.html
Let’s now imagine that inside the public_html directory we have another directory where we collect text files, called “text-files”. We want to link from index.html to a text file in this directory, called “file1.txt”. Keep in mind that the relative path of the txt file with respect to the index.html file (located in the public_html directory), will be:
text-files/file1.txt
Here’s a link from index.html to file1.txt
|
1 2 3 |
<a href="text-files/file1.txt">Go to text file 1</a> |
Let’s imagine we have a subdirectory of public_html, a direct child directory of public_html, containing an html file. To link from this file to index.html, here’s the link:
|
1 2 3 |
<a href="../index.html">Go to index.html</a> |
You may remember that .. means “up one directory” in relative paths notations.
In paths notations used in web pages, a slash means the Document Root. This is conceptually similar to the fact that in Linux absolute paths the first slash indicates the system root. When it comes to path notations in HTML files, the root (/) is the Document Root as defined in the Apache configuration file rather than the system root:
|
1 2 3 |
<a href="/">Back to the web site home page</a> |
This is a link to the Document Root of a web site, that will work from any page of the same site, irrespective of it’s location in the Document Root branch of the filesystem. If the Document Root contains an index.html or index.php file (typically this page is the actual home page of the site), this is the file that will served on clicking the link.
The effect of clicking on a link can vary depending on the type of file, in particular it’s extension, and on the server configuration. .html files are usually displayed in the browser. For .zip files, a download is usually offered to the visitor instead.
Embedding Images in HTML Pages – The img tag
Images can be embedded in HTML pages by using the img tag. img is an inline tag.
The src Attribute of the img tag
The main attribute of the img tag is “src” (search). Similarly to the href attribute, src will accept an absolute URL of an image, starting with http, or the path, relative or absolute, to a local image file. As seen with href, when using an absolute path (starting with a slash) in this context, the first slash refers to the Document Root of the web site rather than the root of the filesystem.
The alt Attribute of the img tag
Another important attribute of the img tag is “alt”, that takes as a value a textual description of the image. This is important for users that navigate with a text-only browsers, or that cannot see the images, for example because they are visually impaired. It is also important to let search engines know what the image is about. In these cases, the alt attribute provides information about the image contents. In other words, using alt attributes increases the accessibility of your web site to a wider audience, including persons with disabilities.
Here’s an img tag example:
|
1 2 3 |
I think that <img src="http://www.cellbiol.com/images/bioweb_color.jpg" alt="The Bio-Web logo"> is a great web site |

As we will see in the next sections of this chapter, the position of an image relative to the surrounding text can be controlled tightly by styling the img tag with CSS.
For now, a simple way to embed an image as a block element instead of inline, is to wrap the img tag in a paragraph or div (a div is a generic container) tags, or to use br tags appropriately.
|
1 2 3 |
I think that <p><img src="http://www.cellbiol.com/images/bioweb_color.jpg" alt="The Bio-Web logo"></p> is a great web site |
|
1 2 3 |
I think that <br><img src="http://www.cellbiol.com/images/bioweb_color.jpg" alt="The Bio-Web logo"><br> is a great web site |
|
1 2 3 |
I think that <div><img src="http://www.cellbiol.com/images/bioweb_color.jpg" alt="The Bio-Web logo"></div> is a great web site |
We leave it to you as an exercise to check how the above examples will render in a browser. You can easily test these lines of code in our web editor.
Linking images with the a tag
Images can be linked to a resource/page by wrapping it in an a tag:
|
1 2 3 |
<a href="/"><img src="http://www.cellbiol.com/images/bioweb_color.jpg" alt="The Bio-Web logo"></a> |
Gives the following, check out that the image is now a link:
Now that you know the basics of text markup in HTML, let’s move to the use of CSS to control the appearance of your web pages or web site.
Chapter Sections
[pagelist include=”135″]
[siblings]
